🧾 What Is an Offer on konfetti?
At Konfetti, an offer refers to a specific workshop, experience, tour, or kit that you host.
🧩 Learn more about choosing the right specialization here.
An offer can:
-
Have multiple dates (e.g., every Sunday at 2 PM)
-
Be published multiple times (e.g., with different locations or variants)
Examples of offers:
- DIY Kit
- City Tour
- Cocktail Workshop
💡 If you run your workshops in both German and English, we’ll translate for you—you just need to set your primary language and create the course in that one language.
Learn how that works here.
🔐 Log In to Your Partner Account
-
Check your inbox – you should’ve received an invitation email with login details.
-
Log in here.
-
Forgot your password? Click “Forgot password” and follow the steps.
-
You can change your password anytime under "User Settings."
-
After logging in, you’ll land on the Dashboard.
💡 No password set yet? Use “Forgot password” to create one yourself.
🧱 Add a New Offer
You can create your new offer (workshop, experience, tour, or kit) in two ways:
1. Dashboard (quick access)
Click on “New Class” at the top of the dashboard. 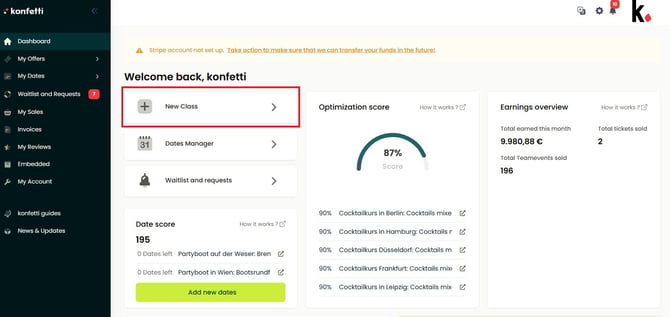
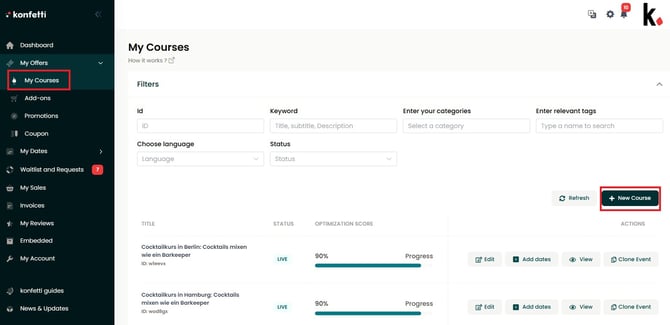
2. My Offers
Navigate via sidebar menu:
👉 My Offers → My Courses → Add New Course
Here you can also edit your existing offers.
🚀 Step‑by‑Step Guide
Want to know how to create an offer on konfetti?
👉 Follow the step‑by‑step instructions below. The steps apply equally to experiences, tours, and kits, with minor adjustments.
1. General Information
In this step, you define the essential basics for your offer – like title, location, language, and target audience.
✍️ Title & Subtitle
-
Title: Concise and clear, max 59 characters
👉 Example: Indian Cooking Workshop in Munich: Make Your Own Naan
Include one keyword (e.g., “Cooking Workshop,” “Pottery”) and the location. -
Avoid mixing languages: Use either German or English consistently.
-
Subtitle (short description): One sentence, max 160 characters, that excites and informs participants.
🗣️ Language & Duration
Specify:
-
The language of your offer
-
How many hours it lasts
🧭 Categories & Tags
-
Click “Select” to choose categories (e.g., “Cocktail Workshop,” “Painting”).
-
You can select multiple categories for better visibility.
-
Categories are hierarchical (e.g., Wine Tasting → Tasting → Food & Drink)
-
Optional: Add tags (e.g., “Team Event Berlin”) to highlight specific use cases or audiences.
-
Kids‑only offers? Then:
-
-
Choose the “Kids Workshops” tag
-
Specify the age group and whether accompanying adults are required
-
📍 Location
Select:
-
On‑site
-
Online
-
To be agreed later (if you don’t have a fixed location)
For “to be agreed later,” inform your customers about the final location via email after booking.
-
Enter your venue address
🚗 Mobile Workshops (optional)
Offer workshops at your customers’ location?
-
Enable Mobile Option → Yes
-
Specify up to how many kilometers you’ll travel (included in the price)
-
The attendee can choose the location when booking
🌐 Publication
Choose whether your offer appears:
-
Only on gokonfetti.com
-
or also within the konfetti booking solution
2. Description
Describe your workshop in a way that instantly engages and converts.
✍️ Style & Length
-
Write in a direct, personal tone (“you,” “your”)
-
Keep it informal and friendly
-
Aim for at least 200 words
-
Structure your text with headers or bullet points
💡 This description appears front and center – it’s your sales pitch!
🧩 Structure Your Description
-
Workshop Content (Introduction)
-
What will participants experience or learn?
-
What’s the goal of the workshop?
-
-
Workshop Flow
-
Provide a rough outline, using bullets to clarify:
-
Welcome drink & meet‑and‑greet
-
Introduction to ingredients/materials
-
Hands‑on part (e.g., making 3 naan varieties)
-
Q&A & tasting
-
-
-
Who Is It For?
-
Beginners? Advanced?
-
Singles? Couples? Groups?
-
Suitable for team events or stag parties?
-
-
What’s Included
-
List included materials, ingredients, or services
-
-
What to Bring
💡 These details automatically appear in the booking confirmation.-
e.g., “Bring a good mood and appetite,” “Wear clothes that can get messy,” etc.
-
3. Summary
In the summary section, you provide your potential customers with the most important information in a clear and concise way – easily visible and digestible at a glance.
Use clear bullet points – avoid long blocks of text.
✅ What’s included?
List what’s included in the price using short, comma-separated bullet points.
Please don’t repeat your description text.
Example: Mix three cocktails, one shot, all utensils, professional instruction
👥 Suitable for private or team events
Show whether your course is especially suitable for groups or specific occasions.
Example: This cooking class is perfect for team events or bachelorette parties.
📍 Location info
Briefly describe where your course takes place.
Examples:
- The barista class takes place in a cozy café in Berlin-Neukölln.
- The workshop is held online via Zoom.
🎟️ Special ticket note (visible after booking)
Add information here that should only appear in the booking confirmation email.
Example: Please let us know about any allergies or intolerances at least 7 days before the event.
➕ Additional products (add-ons)
You can offer optional services or products that customers can add during booking.
Examples:
-
Food add-on
-
Session extension
-
Accompanying guest
-
Take-home item (e.g., DIY kit, recipe booklet)
🔗 Learn more about add‑ons here.
📦 Is a product box shipped?
If your participants receive a product box in advance (e.g., for online cooking classes or DIY kits), set the toggle to “Yes.”
This allows customers to enter their shipping address during booking.
4. Pricing
In this step, you can set your pricing.
First, specify how many people can participate in your experience, both the minimum and maximum.
❗These numbers are also relevant for group bookings, so make sure you provide the participant count accurately, as it will be automatically transferred to the group term creation later.
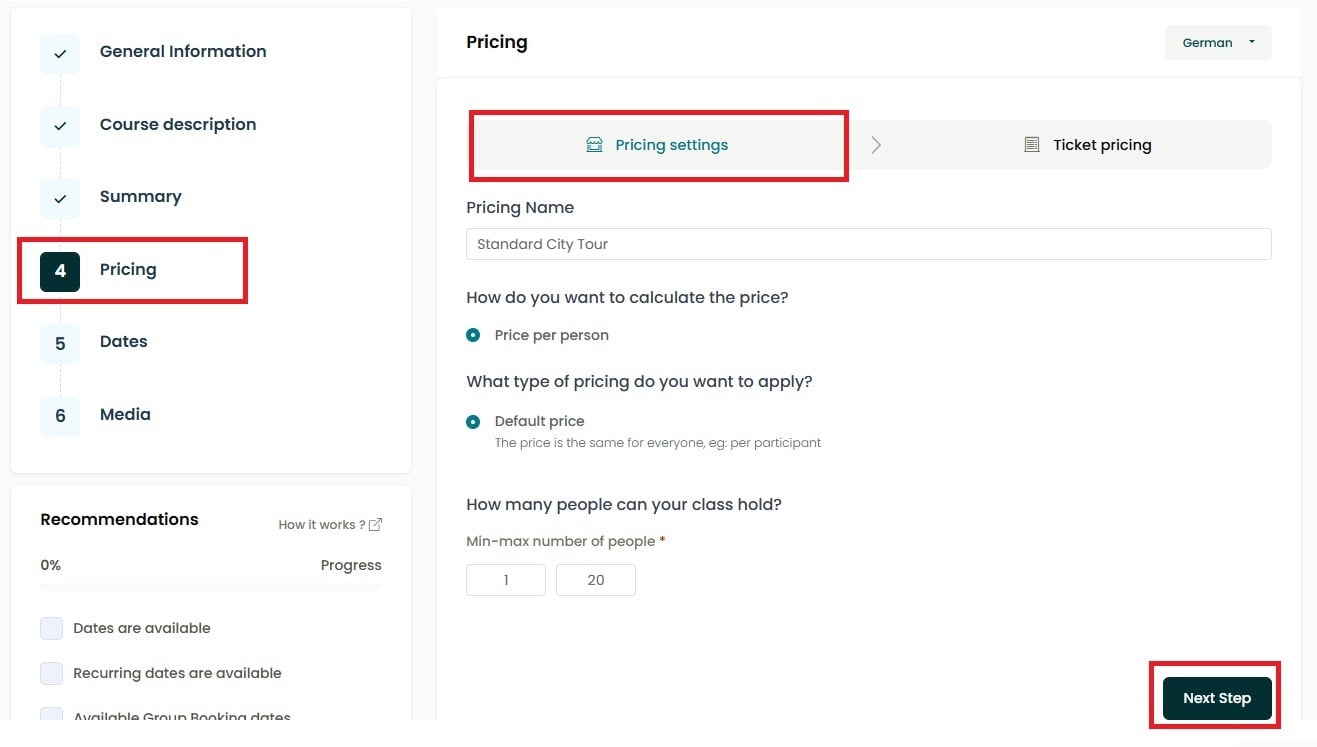
In the next step, you can define different pricing tiers, for example:
-
1 - 10 participants → €50 per person
-
11 - 20 participants → €48 per person
This way, the price will be automatically adjusted for the group booking.
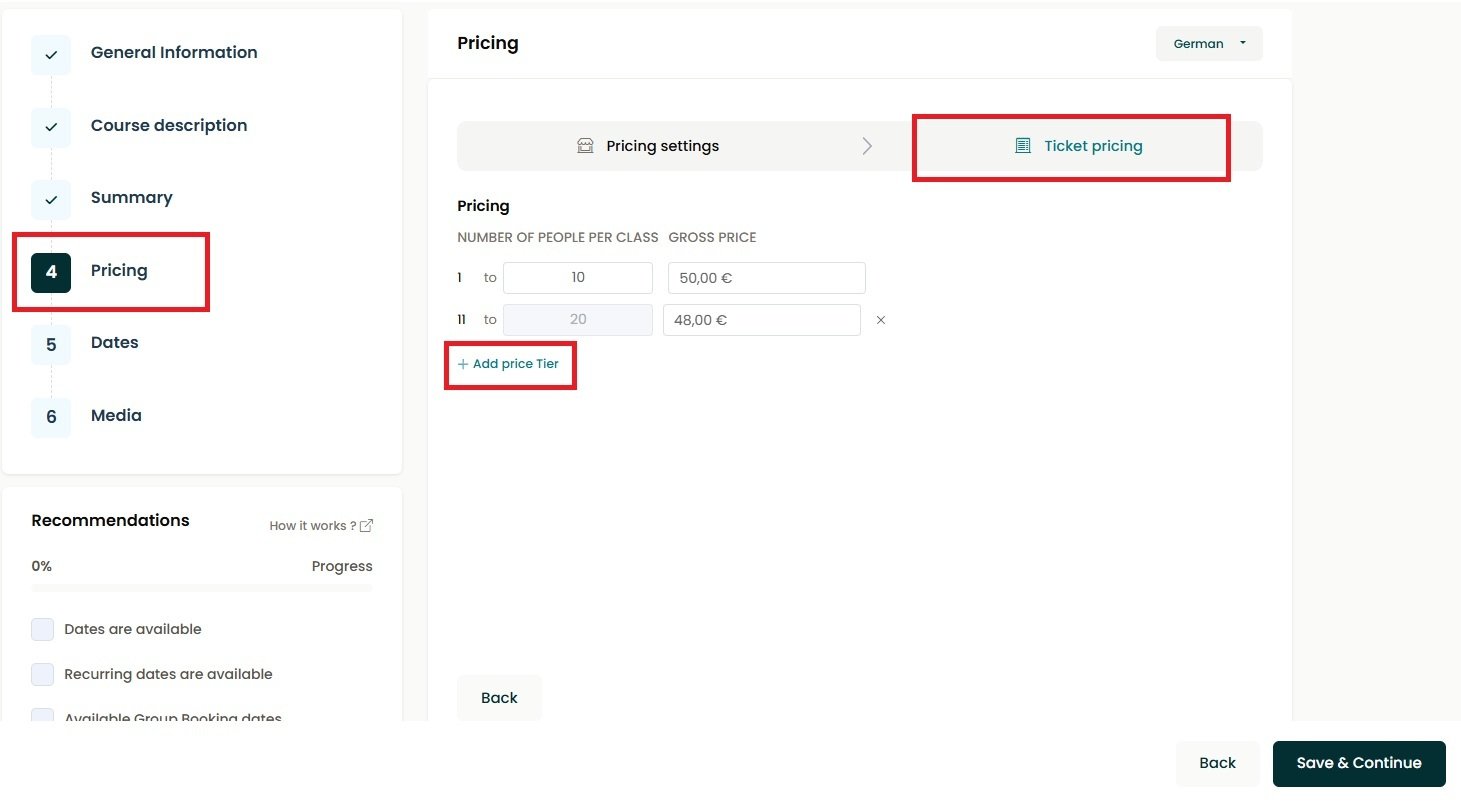
If you do not offer tiered pricing, it will remain with a single price tier based on the price per person.
5. Dates
💡 In general, every offer can be requested as a private group event.
However, adding public dates or group booking options increases your visibility on the website and improves your ranking – which can significantly boost your bookings and revenue.
🧾 Option: Only available as a private/team event?
Choose whether your workshop should only be bookable as a private or team event.
If you activate this option:
-
Only group booking dates will be shown
-
Vouchers cannot be used for this offer
🗓️ Add your dates
You can create different types of dates.
💡 Use the icon next to the trash can to duplicate existing dates and save time when creating new ones.
- Public dates
Individual tickets can be booked. A minimum participant count cannot be set. - Group booking dates
Only bookable for private groups, e.g., team events, bachelor(ette) parties. The participant settings from the pricing are automatically applied to your group dates. - Recurring dates
For example: Every Tuesday at 6 PM - Multi-date events
Workshops that span several days or consist of multiple sessions per booking
🔗 Learn more about the different date types.
📦 Product box? Add shipping costs
If you send a product box to your customers as part of your workshop (e.g., for an online class or DIY kit), you can also enter shipping costs per booking here.
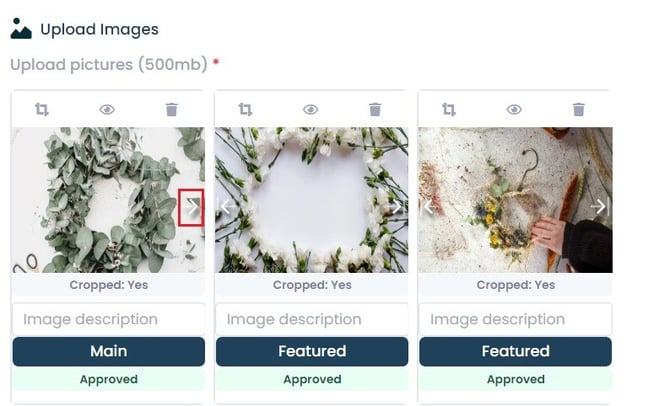
6. Gallery
Here, you can upload images and a video that showcase your workshop in the best possible way.
High-quality visuals significantly increase your chances of getting booked – so take your time selecting meaningful content!
📸 Uploading images – what to keep in mind:
- Aspect ratio 4:3
This format works best with the Konfetti layout. - Quality matters
Upload at least 5 well-lit, sharp images – you can upload up to 10 images. - Keep it natural – not promotional
❌ No logos, text overlays, or heavy filters
✅ Use authentic photos that show real scenes from your workshop - Show what your workshop offers
Your images should reflect the content, process, or atmosphere of your offer. This gives potential customers a strong first impression.
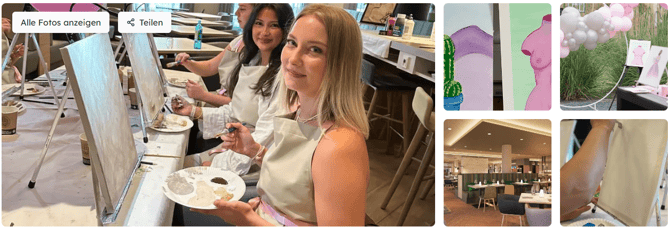
🖼️ How our image gallery works
Your gallery includes:
-
One main image (displayed first)
-
Up to 4 gallery images
-
An extended view (“View all photos”)
📌 Tip: Use the arrow icons to rearrange the order of your images and control which ones customers see first.
🎬 Optional: Upload a video
You can upload 1 video per workshop, either in portrait or landscape format.
Make sure the video is well-lit and looks natural.
Sound is optional – but if included, it should be clearly understandable.
🚀 Publish Your Offer
When you create a new offer, it is first saved as a “Draft.”
Once you’ve completed and saved all the required steps, the offer status automatically updates to: “Published (pending review)”
🕵️♂️ The konfetti team will manually review your offer and then publish it online.
🕑 Reviews typically take around 1 business day.
📌 Good to know:
-
All new offers and any updates to existing ones are reviewed and approved before going live.
-
Reviews take place daily, Monday through Friday.
-
Once approved, your content will be visible on the website.
✅ Make sure the offer status is set to “Published” when you’ve completed your edits.
💡 One more tip:
👉 Here you'll find SEO tips to help your offer get even more visibility on gokonfetti.com.
Our gallery:
- Our image gallery consists of a main image, 4 side gallery images and an extension.
- You can set a main image and your side gallery images.
- You can use the navigation arrows to change the position of your images.
Upload a video:
You can also upload up to 1 video per course, in portrait or landscape format.
4. Publish your course
When you first create your course, it is initially a “draft”.
As soon as you have completed and saved all the course editing steps, your course status will automatically change to “Published (after approval)”.
The konfetti team will check your course in advance and then put it online on gokonfetti.com. This takes about 1 day.
💡 You can find tips for SEO optimization of your offer here.