- What is a Date Request?
- Date Request settings
- Responding to Date Requests
- How can I exclude events from Date Requests?
1. What is a Date Request?
You will receive an email notification whenever a new Date Request is submitted.
Please note that Date Requests are automatically declined by the system after 5 business days if no response has been provided.
A customer who submits a Date Request has a specific date in mind for your event that is currently not available on your course page.
Customers can request up to three preferred dates for your event. This works for individual participants joining a public event as well as for groups requesting a private event, such as a team event, bachelor/bachelorette party, or birthday celebration.

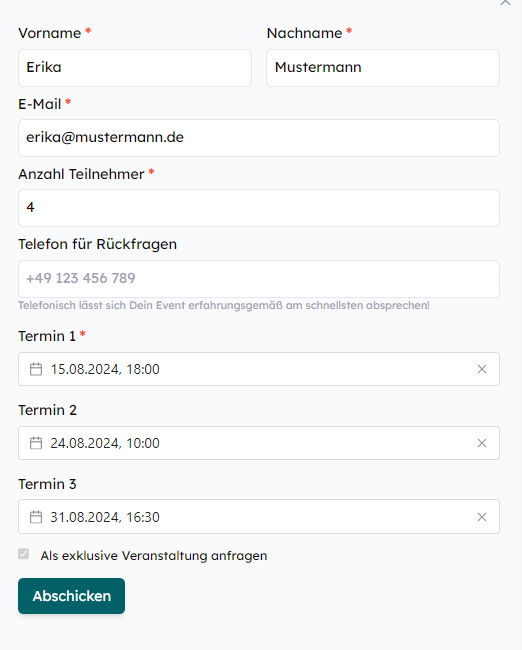
Date Requests for up to eight participants are sent directly to your Partner Portal. You will receive an email notification for every new Date Request. Requests for more than 11 participants are handled by our Sales Team. The team will contact you by email or phone with suitable requests that you can accept or decline.
2. Date Request settings
You can watch the video or read the instructions below.
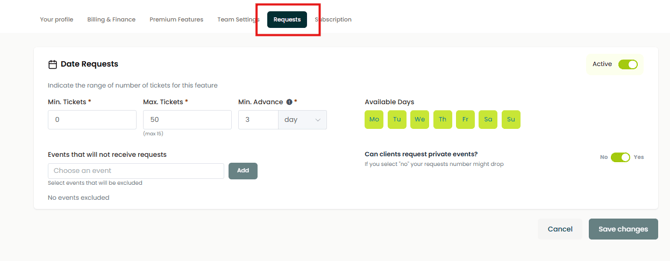
You can manage Date Request settings in your account under “Waitlist and Date Suggestions.” These settings apply to all your courses.
You can define the following settings:
- Enable Date Suggestions and Date Requests
Decide whether customers can submit Date Requests for your events. - Allow private event requests
Decide whether customers can request exclusive group bookings, such as bachelor/bachelorette parties, birthdays, or team events. - Weekdays available for Date Requests
Exclude weekdays on which customers should not be able to request dates. - Ticket settings
- Minimum number of tickets per Date Request
- Maximum number of tickets per Date Request
- Minimum advance notice for requested dates
3. Responding to Date Requests
You can watch the video or read the instructions below.
You can manage your Date Requests in the Partner Portal under “Waitlist and Date Requests.” Click “Respond to Request” to edit a Date Request.
You have the following options:
3.1 Accepting a Date Request
- Click “Edit and Send.”
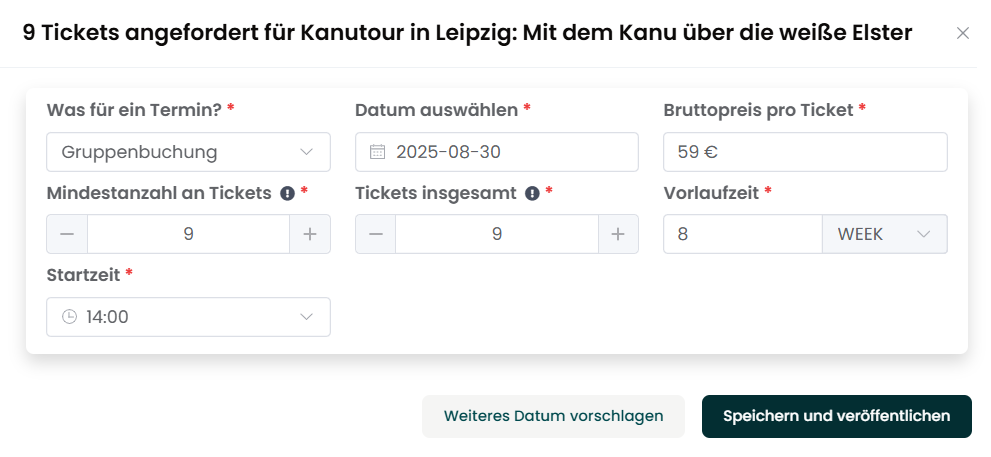
- Choose whether the request is for a public event or a private group booking. The requested event type is preselected by default.
- For group bookings, the requested number of participants is transferred automatically. The minimum ticket quantity and total ticket quantity are set accordingly. You can adjust both if needed.
- Define the advance booking period for the date.
- Click “Save and Publish.”
- The customer receives an email confirming that the Date Request has been accepted and can book the date directly through the booking link.
- The date is then publicly visible on your course page.
- If you accidentally create a public event instead of a group booking, or if you want to adjust the number of available tickets afterward, you can do this in the Event Manager or in the course settings.
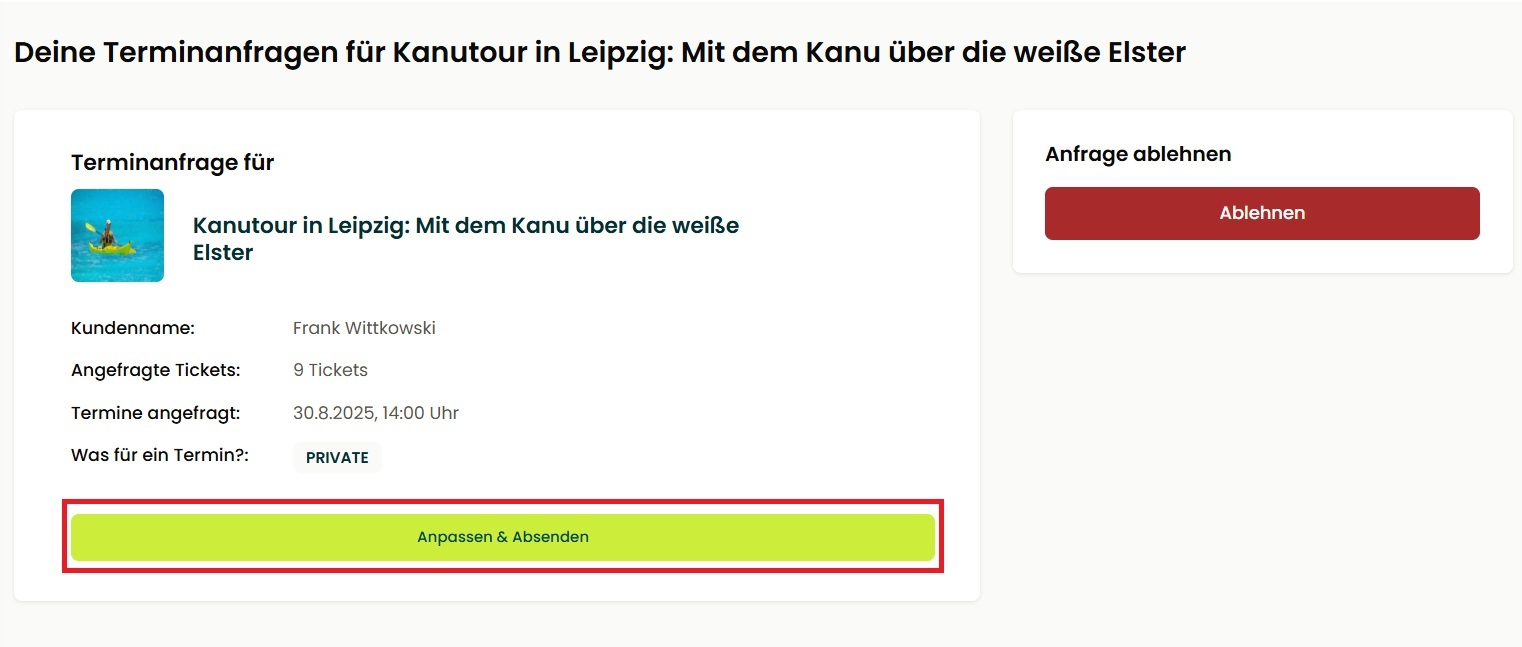
3.2 Suggesting an alternative date
- Click “Edit and Send.”
- Adjust the requested date before publishing it. You can edit:
- Event type
- Date
- Start time
- Number of tickets
- Gross price per ticket
- Add further possible dates via “Suggest another date.”
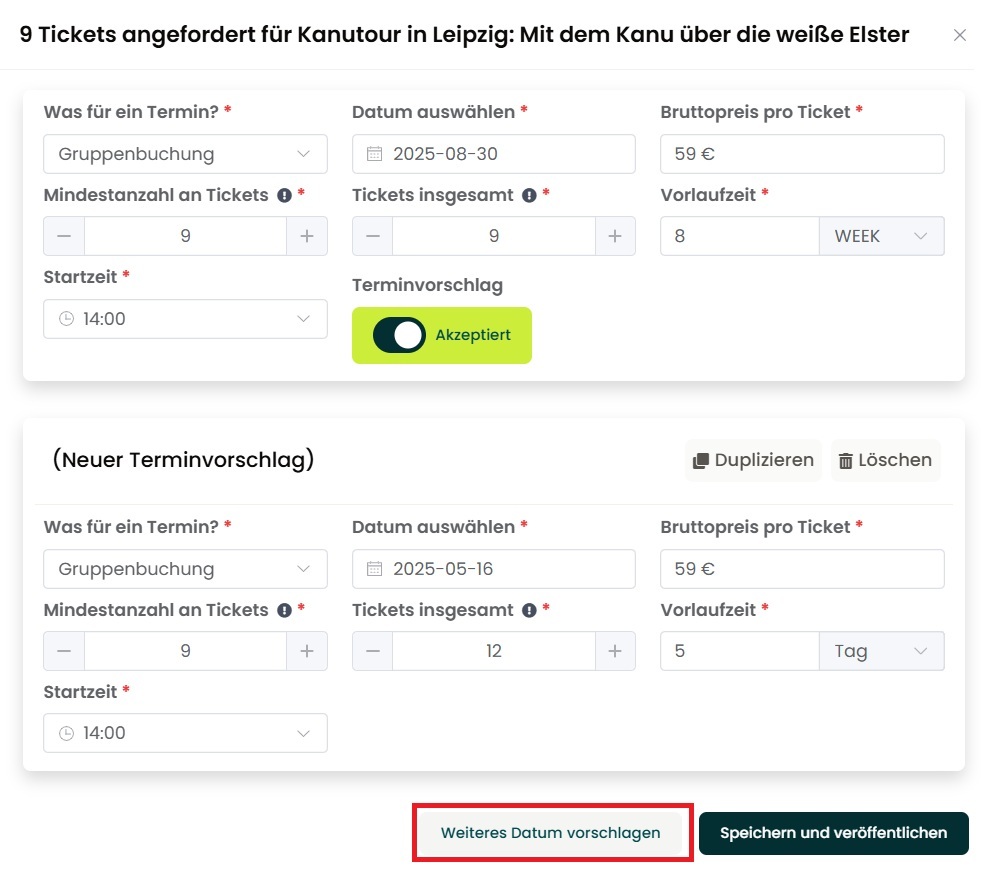
- Click “Save and Publish.”
- The customer receives an email with your alternative date suggestions and can book the preferred date directly through a booking link.
3.3 Declining a Date Request
- If you cannot offer the requested dates and do not want to suggest an alternative date, click “Decline.”
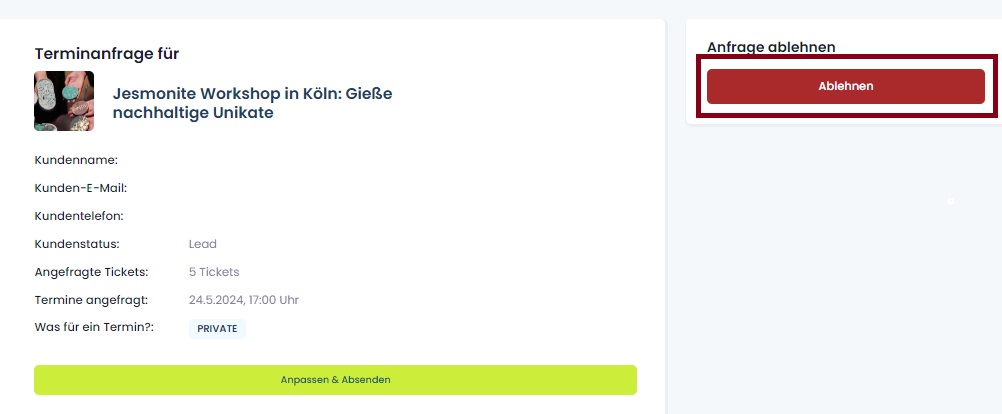
You will receive a regular booking confirmation once the customer, another customer, or another group books your published date.
When you decline a Date Request, the customer is asked whether they would like to join the waitlist for your course. If they join the waitlist, they will be notified whenever you add a new date.
4. Excluding events from Date Requests
This is useful if you only offer certain events on fixed dates or want to reduce scheduling effort.
Use this setting carefully. If you exclude too many events from Date Requests, you may miss potential bookings and reduce your revenue.
To exclude events from Date Requests:
- Log in to your Partner Portal.
- Click the gear icon in the top-right corner.
- Select “Account settings.”
- Open the “Date Suggestions” tab.
- Scroll down to “Events that should not receive Date Suggestions.”
- Select the events for which Date Requests should no longer be available.

