
- Rescheduling a Customer Booking
- Rescheduling an Entire Class Date
1) How Rescheduling Works
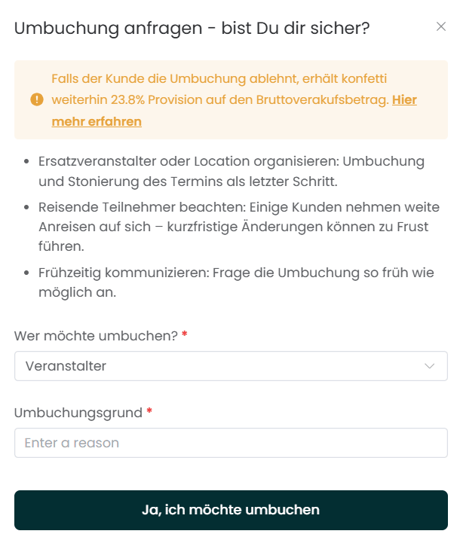
Important: If you cancel a class date or the customer declines the rescheduling request, konfetti will still retain a 23.8% commission on the gross sales amount, as our services have already been provided and additional banking fees apply to the refund process.
Customers are not entitled to cancel their tickets, but they may request a rescheduling (e.g., due to illness). Whether a rescheduling is approved depends entirely on your discretion as the organizer.
Rescheduling an Order
Step 1: Open the Order
- Navigate to My Sales.
- Find the relevant booking and click "View Order" (eye icon).
Step 2: Initiate the Rescheduling
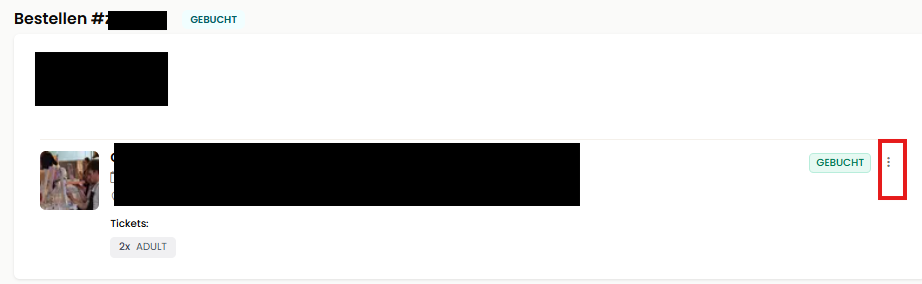
- Open the order and click the three-dot menu.
- Select "Rebooking".
- The rescheduling form will open.
Step 3: Specify the Reason and Request Type
- Select who initiated the request:
- Organizer (you are moving the booking)
- Customer (the customer requested the change)
- Enter a reason for the rescheduling (e.g., "I am unavailable on that date").
Step 4: Suggest New Dates
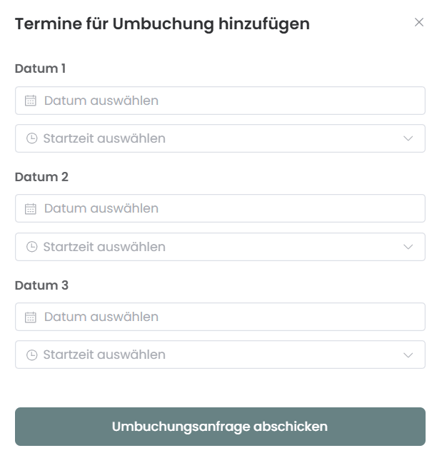
- Add up to three alternative dates including date and time.
- Click "Send Rescheduling Request".
Step 5: Customer Selection
The customer will automatically receive a notification and can:
- Confirm one of the proposed dates, or
- Request a refund.
Step 6: Track the Status
- The order status changes to "Rescheduling Requested".
- Once the customer makes a selection, the booking is automatically updated and both you and the customer receive a confirmation email.
- You can track all rescheduling requests under My Sales → Reschedulings.
2) Rescheduling an Entire Class Date
Use this option if you need to move a complete class date to a new date and time.
Step 1: Open the Class Date
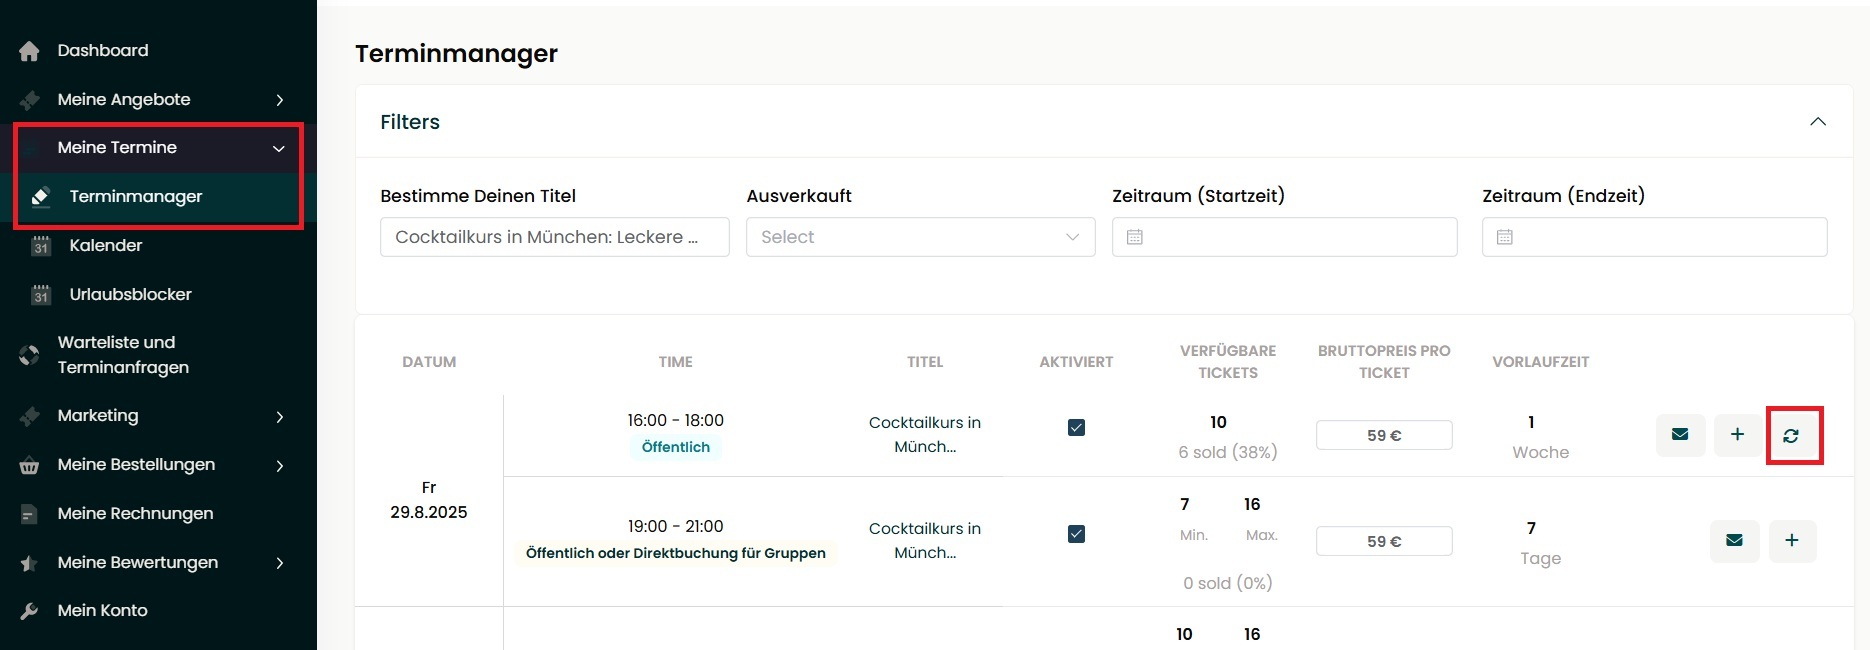
- In your Partner Area, navigate to Dates → Date Manager.
- Locate the affected class date and click the arrow icon.
Step 2: Enter the Reason
Provide a reason for the rescheduling (e.g., "I am unavailable on that date").
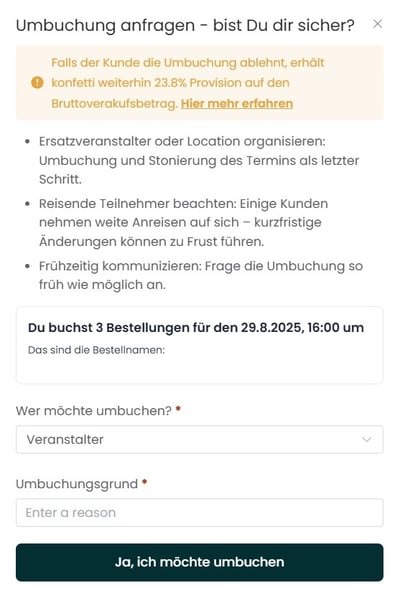
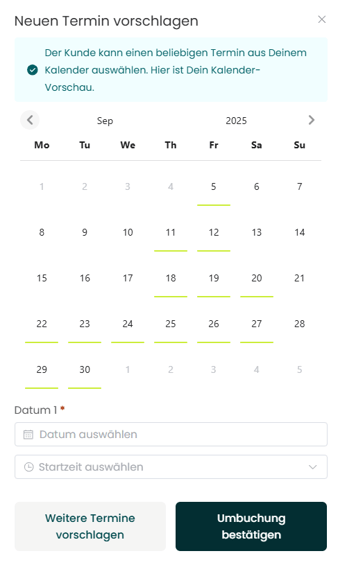
Step 3: Select a New Date
- In the calendar view, you can see all upcoming available dates.
- Select the new date and time for the class.
- Confirm the rescheduling.
Step 4: Customer Confirmation
Customers automatically receive a notification with the new class date and can:
- Confirm the new date, or
- Request a refund.
Step 5: Monitor the Status
- The booking status changes to "Rescheduling Requested".
- Once the customer responds, the rescheduling is automatically processed and confirmed via email.
- You can monitor all rescheduling requests under My Sales → Reschedulings.